
How to create blog with Jekyll and Github pages
If you always wanted to start your blog and don’t know where to start. Well, just follow this quick guide and by the end of this article, you’ll have your own working blog live on internet (sounds easy right, well it is actually easy. Let’s get to it!).
In this guide, we’ll go through the steps to bring our exciting blog to life (yay!!)
- Step 1 - Create GitHub account (in case you already don’t have one) and create a public repository to host our blog’s code. (We’ll use GitHub Pages to host our blog for Free, exciting right!).
- Step 2 - Set up Jekyll (a tool to generate static sites using markdown syntax) in your computer. By end of this step, our blog should be up and running.
- Step 3 - (By the way, this is an optional step) If you have your own domain, we’ll configure DNS settings to point it to our newly created blog.
Create GitHub Pages repository
- Create GitHub account (in case you already don’t have one).
- Create a new repository
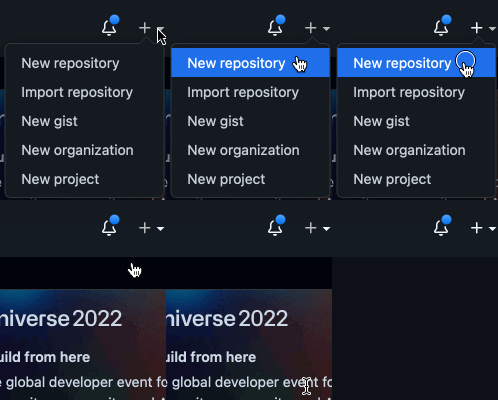
- Name your repository as
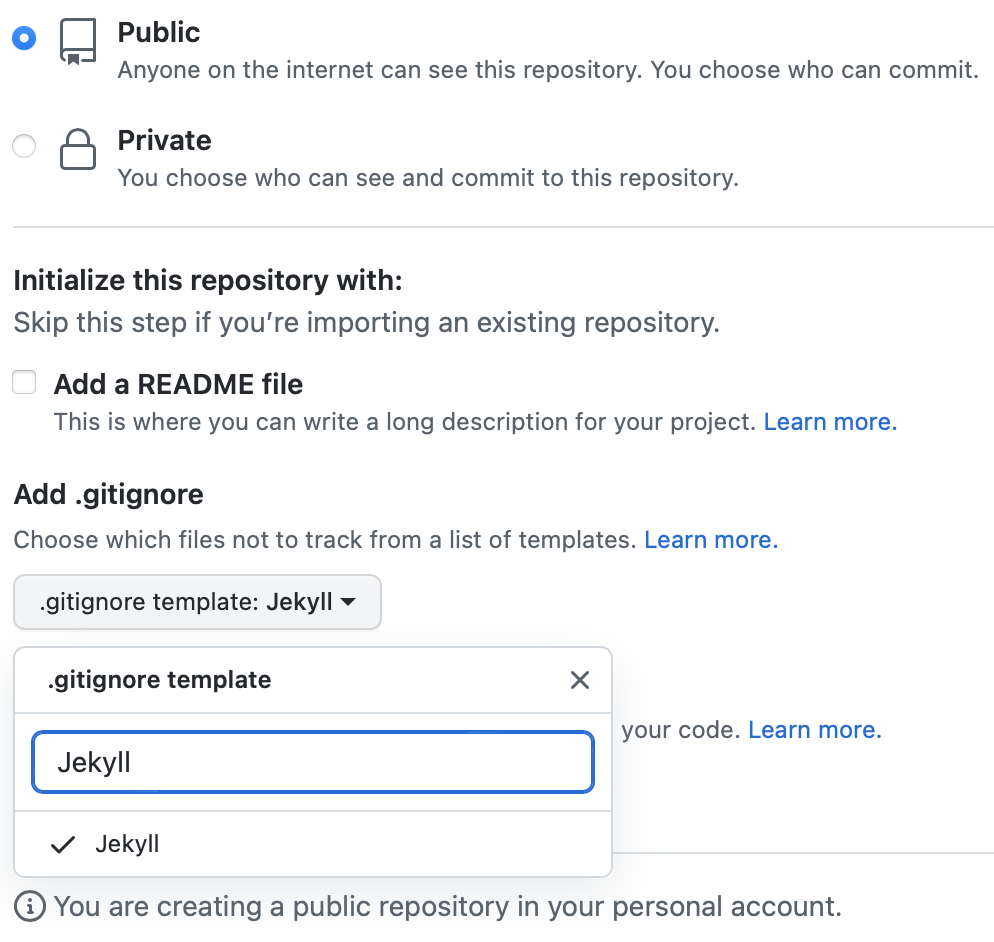
<github-username>.github.io(well this is important, other names won’t work here.) - Set the visibility of this repository as
publicand chooseJekylltemplate for your.gitignorefile as shown below.
Setup and configure Jekyll
Requirements
- Ruby version 2.5.0 or higher, including all development headers (check your Ruby version using
ruby -v) - RubyGems (check your Gems version using
gem -v) - GCC and Make (check versions using
gcc -v,g++ -v, andmake -v)
Installation
For detailed install instructions, follow the guide for your operating system.
Install Jekyll
After installing Ruby with chruby, let’s install the latest jekyll and bundle gems:
$ gem install jekyll bundlerCreate site with Jekyll
- Clone the newly created repository to your local computer. (see if you can give some link for cloning)
- Open terminal in the directory where you just cloned the github repository.
$ cd REPOSITORY-NAME
# Changes the working directory- Create new jekyll site by running following command
$ jekyll new .
# "." tells jekyll utility to create new site in current directory- Now, it’s time to see our new blog in our local computer.
$ bundle exec jekyll serve- If everything went well then you should see the following output. Trying running the url
http://127.0.0.1:4000/. If you’re getting some error then try the next step.
    Server address: http://127.0.0.1:4000/
Server running... press ctrl-c to stop.- [Optional step] Open
<Parent Repo folder>/Gemfilein text editor of your choice and and add following line.
gem "webrick", "~> 1.7"- [Optional step] Install the gems from Gemfile by running following command.
$ bundle- Commit your changes to git repo and push these changes to remote branch.
GitHub pages - publish settings
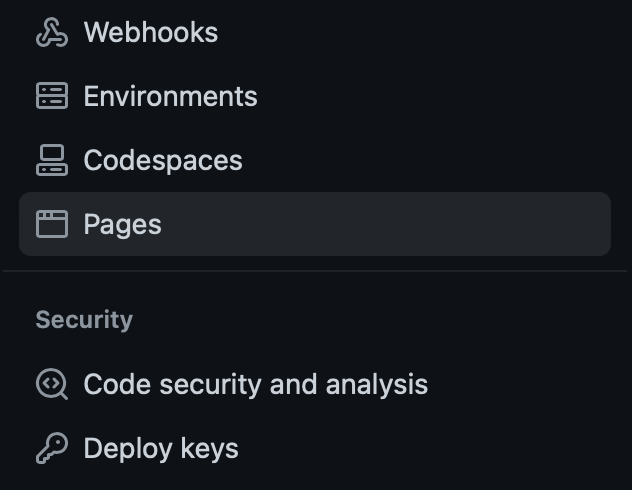
- Go to GitHub and open the repository that we created earlier and go to
Settingstab as shown below.

- Go to
Pagessection.
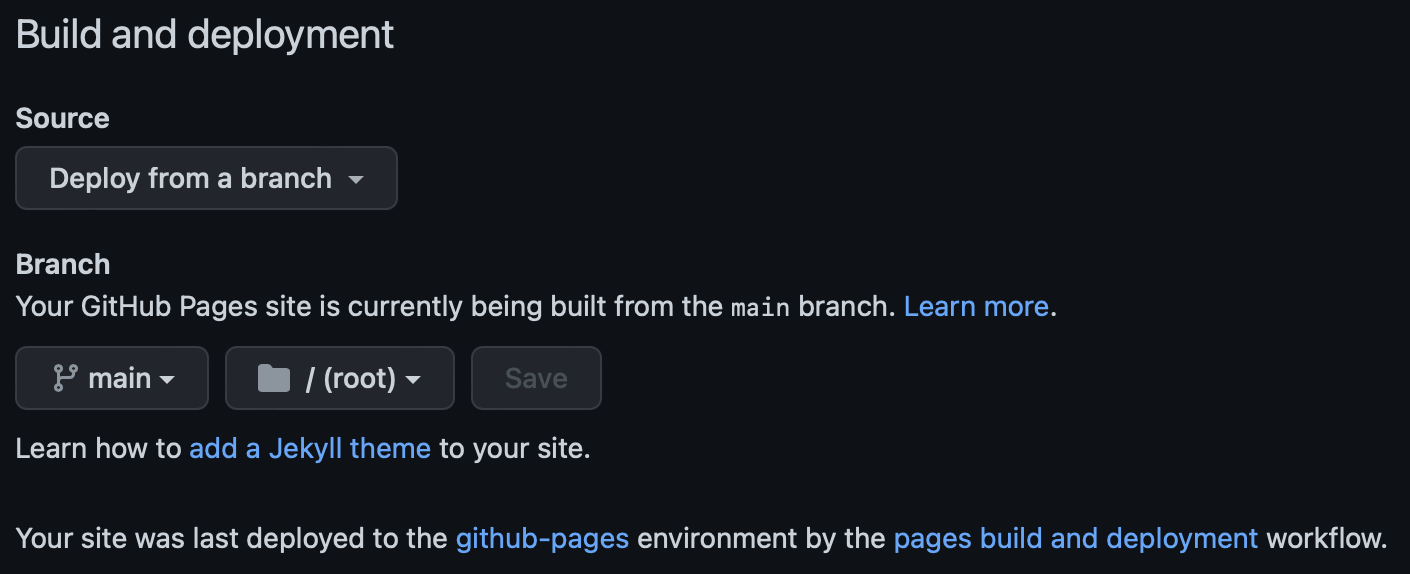
- Under the section
Build and deployment, make sure to selectSourceasDeploy from a branch. Selectmainand/rootin branch settings.
Congratulations 👏, your blog is live at https://<username>.github.io
[Optional] Configure custom domain
Well, if you already have your own domain or planning to have one, then following steps might interest you.
- Go to
Manage DNSsection of your domain provider. - Add following DNS records with exact same values.
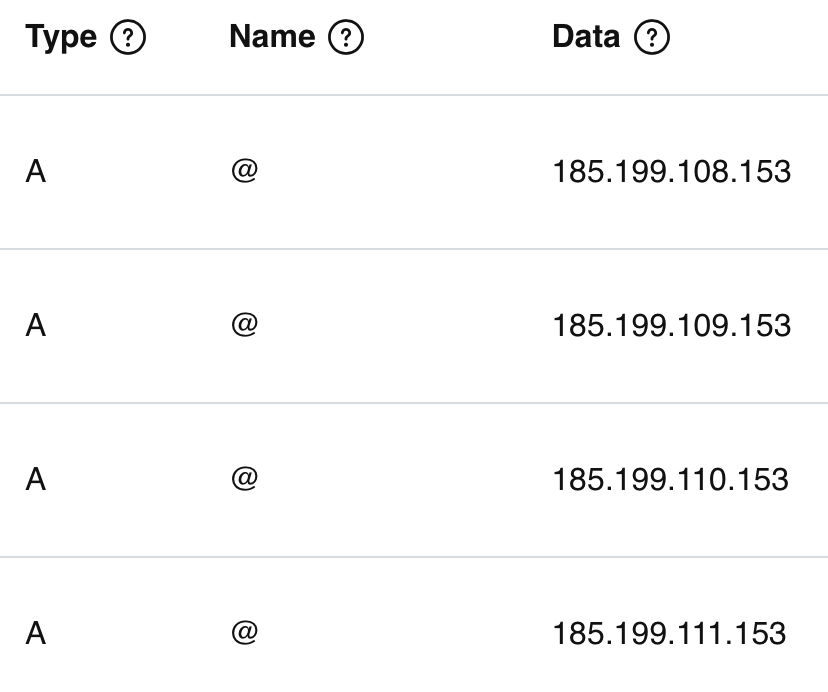
- Add another record with
Type=CNAME,Name=wwwandData=<username.github.io> - Under
Settings > Pages > Custom Domainadd your domain name (e.g. example.com) and click onSave.
That’s it, we’re done with setup here :) Your custom domain should now point to your newly created blog.
Conclusion
I hope you’re able to successfully set up your blog by following the instructions given in this post. Do let me know in comments, if you find it useful. I’ll try my best to help with any issues that you might face during this setup.
Cheers folks!